Hey Everybody,
Are you tired of trying smokey eyes again and again and not getting it right? Well today I am bringing you a super duper easy smokey eyes. This look is my current favorite. It is so so so versatile that any eye shape or eye color can pull this off. Also its soft yet glamorous at the same time so you can wear this look for weddings, parties or even daytime events. I absolutely love this look and I have worn this look for so many weddings and parties in past few weeks with different clothes and lip colors and each time this looks wonderful and very dressy. So let me show you how I get this soft smokey eyes with simple techniques which is great for BEGINNERS or for people who do not feel comfortable wearing an intense black smokey eyes. I have explained the whole process in the detail with pictures in 10 easy steps. So lets get started!!
Step 1
 |
| Primed eyes |
Okay so before starting, make sure to prime your eyes, as we want all the colors to come out nicely, blend well and stay put for longer. You can use any primer you like. For this look I somehow like to prime my eyes with my concealer. I have already primed my eye in this picture using Maybelline Dark Circle Eraser in shade Honeymelon. I use a tiny bit and blend it with my fingers till my brow bone. Then I set it using a face powder liberally (Rimmel Stay Matt in shade 006). Setting your primer/concealer is very essential for this look as it will help the blending dark shadows easy and also avoid creasing. You can use any setting powder or skin colored eye shadow to set your eyes. But do not avoid this step as it will make a huge difference.
Step 2
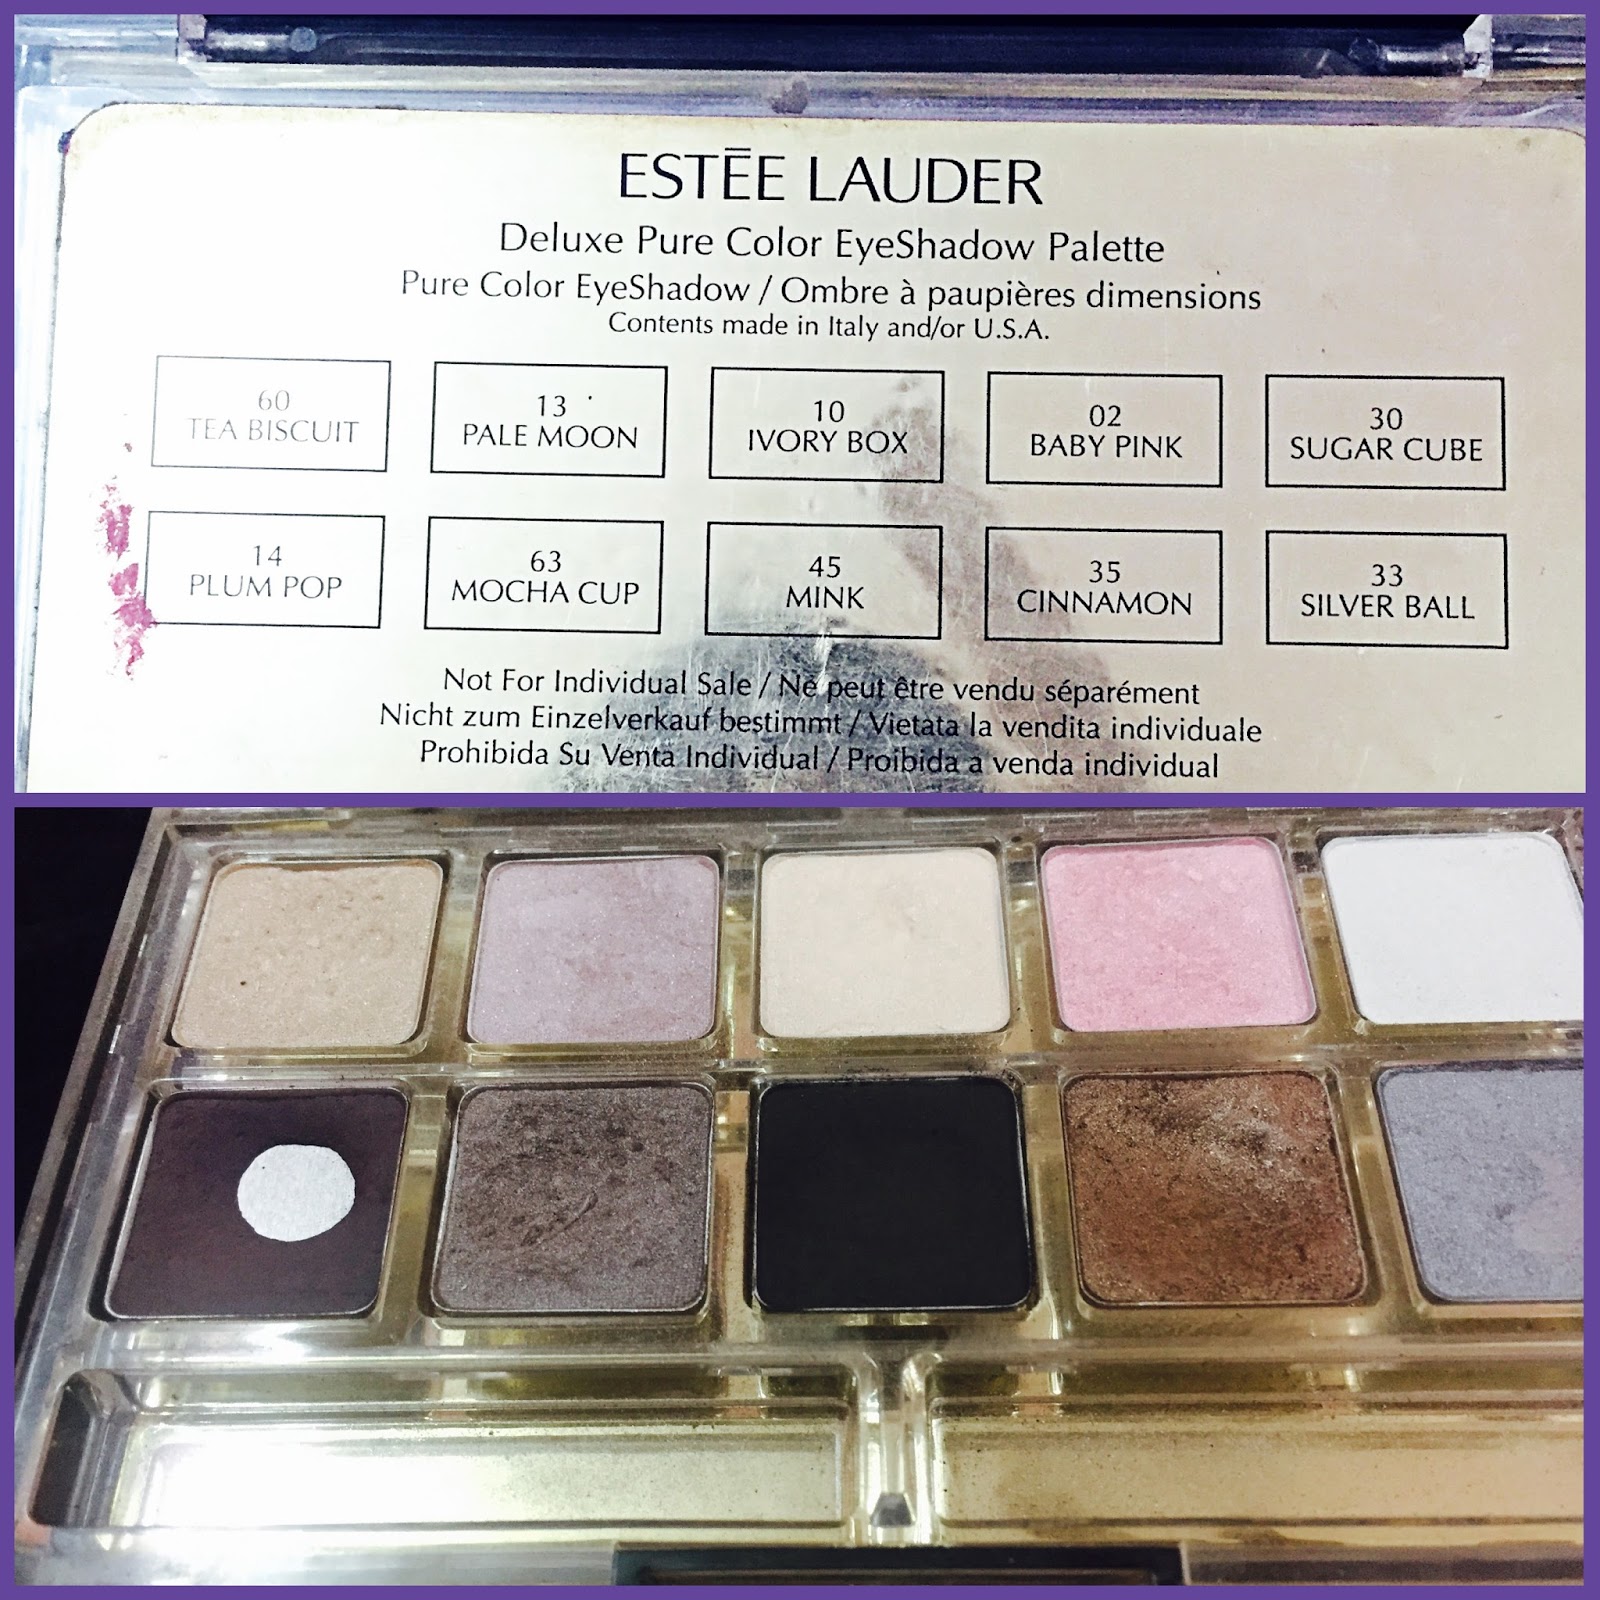
We need to have a matt black and a dark brown/purplish shadow. Today I am using Estee Lauder Deluxe Eyeshadow Palette for this look. I will be using the matt black shade-Mink and purplish brown shade-plum pop for the most part of the look. You can use any matt black and brown for this look. Using MAC's Corrupt (matt black) and Espresso (dark brown) is a great option as well. Also make sure using right brushes. I will be using these four brushes today.I will name them as I use them in the next steps.

Step 3
So firstly I will use plum pop using my Sigma E25 and put it directly on my crease taking it on the outer 1/3rd of my eye. I usually try to do this with open eyes looking in the front. This helps me to see my natural crease and deposit the color better. As I go near outer corner I bring the color down on the eyelid too mapping the outer v of my eye. Picking up little, depositing and blending is the trick to get it flawless. Keep repeating this till the time you get the desired look. I do this process two times and you can see clearly in the picture below how it looks. You can use MAC 217 blending brush too for this look. Its the exact same brush. But using a small crease blending brush will make the look easier.
 |
| plum pop on Sigma E25 |
 |
| Pulm pop in the crease and outer corner |
Step 4
After I have mapped out the eye, now we will do the fun part that is using the black eye shadow. I am using a flat packing eyeshadow brush in medium from Vega. It is a very cheap brush and best for packing colors. I am using this and taking a little Mink on my brush and packing it in center of my lid. I use it only on the mobile part of the lid. I start packing it from my lash line and then drag it upwards. I keep dipping the brush and cover my eyelid. Now make sure you dont go overboard with this. Keep the shadow little below the crease.You can see in the picture that I have kept this shadow much lower from the crease Also do not pack it in the inner corners of the eye. We do not want to have raccoon eyes. After I have the black sufficiently on the lid I will stop and it should look something like this in the picture below.
 |
| Mink on Vega eyeshadow brush(M) |
 |
| Mink packed on the eyelid |
Step 5
At this point this looks very harsh and funny. So now we will just blend it all and make it softer. So once again I will go back again with the Plump pop and add just a tiny bit of Mink on my Sigma E25 and start blending over the edges of the black shadow we put. Now I keep blending and blending this till I can see no harsh lines. It should appear as the black is blended in the brown in the crease. I also take a little mink again and blend on the outer corner for extra dimension with the same brush. You can see how blended and seamless it looks in this picture.
 |
| Blend Mink with Plump pop with Sigma E25 |
Step 6
Now we are almost done with this look. I will take my Sephora Pro crease blending brush -17 with no shadow and blend the top of the crease. I also dip it then in the exact same face powder Rimmel stay matt and clean up above the crease till the brow bone. This will neat up the mess and difuse any harsh lines left overall. Also make sure to blend the outer corner and after all that work it should appear like this.

Step 7
Now I will take my Estee Lauder double wear stay-in-place Eye pencil in shade Onyx. You can take any Black kohl pencil and apply to your lower waterline. I apply it over my waterline and leave just a little space near the inner corner exactly as I did with my eyeshadows.

Step 8
Now it is time to smoke up the lower lash line. I don't like smokey eyes without adding some pigment to the lower lash line. It looks more sultry and makes your eyes appear bigger. For this I will take a small flat angled brush (I use this to do my brows). You can use any flat edged brush for this. Now dipping it in Mink I will apply it right under my lower waterline. It will secure your kohl and also add a bit more dimension. I also just take it till my 2/3rd below the water line.

Step 8
Now we take a tiny little amount of plum pop again on Sigma E25 and blend it below our lash line and connect it to the outer corner. This will look symmetrical and amp up our smokey effect. A little tip: Try to look up while doing this. It will help with the blending easily.

Step 9
So now we are done with our blending process. I am going to take a small detailed definer brush from real techniques and use a champagney gold shade shade from the same palette called tea biscuit which is top left shade. I will also spray my Sephora beautifying water to wet it (makes the shiny pigment stand out and show better). You can use Mac Fix plus spray or eye drops to wet your eyeshadow. If not you can also use it dry. Now i will apply it exactly on the inner corner of my eye top and bottom. It will open up your eyes and add extra glamour. Also this will help the appearance of dark shadows look more neutral. You can use any small brush for this as long as you can fit in your inner corner. A little tip: If you are going to use your brush wet, try using a synthetic brush as it picks up the pigment better when wet. I also use the same color and highlight my brow bone. I simply deposit the color on the arch of my brow and blend it away. You can see me doing it in the picture below.
 |
| Tea biscuit on a small definer brush |
 |
| Highlighting inner corner and browbone |
Step 10

So now we are done working with the eyeshadows. I will coat my lashes with loads of mascara. Try using 2-3 coats. I am using my all time favorite Too faced- Better Than Sex mascara. I apply it on my top and bottom lashes very generously.
Finally we are done with this look now.I am very glad with the way it came out. You can see that I have added a few pictures in different angles to show you exactly how it looks.
 |
| Final look:) |
I have also added a picture in the end with false lashes on with same look I did last night. You can totally rock this with or without lashes based on your preference. I personally like lashes especially for special events.
 |
| Comparing the Final look without falsies and with them :) |
And that is it guys!! I hope you found it interesting and easy to do. This is a classic look you never can go wrong with. Make sure to try it and let me know how it turns out in the comment section below.
Thank you for reading, I really hope you enjoyed. Loads of love!
Sharoon:)
No comments:
Post a Comment